I visited some online stores to study night vision goggles and scopes (research!) and found that images from NVDs also tend to include some noise, some blur, and dark areas near the edges. So I'll incorporate these visual elements into our project to add realism.
Going Gray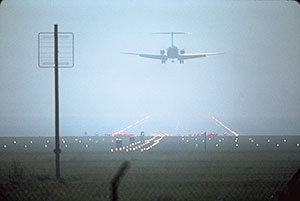 The first step is to convert your source file to Grayscale. ChooseImage> Mode> Grayscale.
Once in Grayscale mode we can create our night vision green, which we'll do by applying a Duotone.
Two Shades Of Green
Choose Image> Mode> Duotone.
This will bring up the Duotone Options dialog box. Now we need to pick two different greens. Our Ink 1 green will be 25BF21. Just click on the little color square and enter the number via the Color Picker. You must name your Inks so name this one NVD1 (or whatever you wish). Repeat this for Ink 2 and enter A8D9A7for the color and NVD2 for the name.
We'll go back to RGB mode now. Choose Image> Mode> RGB Color. Next we'll increase some of the light in the source file.
Tweak With Levels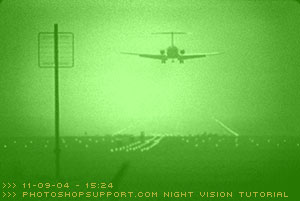 Copy your Background Layer and name it. Select your new layer and choose Image> Adjustments> Levels.
In the Input Level dialog box enter (from left to right): 70, 1.00, and230. This will boost the contrast and give us more of a glow from some of the light.
Selective Blur
Choose your Blur Tool and set it to a low opacity, about 20%. Choose a medium size brush and run it across the bottom of the photo, in this case to make the runway approach lights slightly blurry.
Add Noise
Now we'll add some noise into the file. Choose Filter> Noise> Add Noise. EnterAmount: 3%, Distribution: Uniforn, and make sure Monochromatic is selected.
Levels - 2nd Pass
Choose Image> Adjustments> Levels. This time in the Input Level dialog box move the Left Slider toward the right to darken the image uniformly.
Final Adjustments
Choose the Burn Tool, set it at Midrange, Exposure 50%, and carefully apply your brush in a circular motion to the outside of the image. This gives a nice subtle darkening effect to the edges. Finally choose Hue/Saturation and perform final tweaks by moving the 3 sliders in very small increments.
So Why So Many Steps?
Each NVD photo will come out slightly different because of the specifics of the source file. The point of having so many steps is to give you a chance to tweak the night vision recipe so you can achieve the desired result by experimenting at different key points.
The Night Vision Thing
Langganan:
Posting Komentar (Atom)
0 komentar:
Posting Komentar